- Forum
- Geiger counter discussions
- Commericial geiger counters
- Hacking the Gamma Scout Alert for radmon.org
Hacking the Gamma Scout Alert for radmon.org
3 years 3 weeks ago - 3 years 3 weeks ago #6359
by Simomax
A member asked me if the Gamma Scout would/could work with radmon.org using the USB and software the counter came with. The answer to that is a simple, no, but it could be down with a quick hack. Simply add a couple of wires and connect them straight to an ESP8266 or similar MCU. This guide only covers the 'Alert' model. There may be differences with other Gamma Scout models. Here is how:
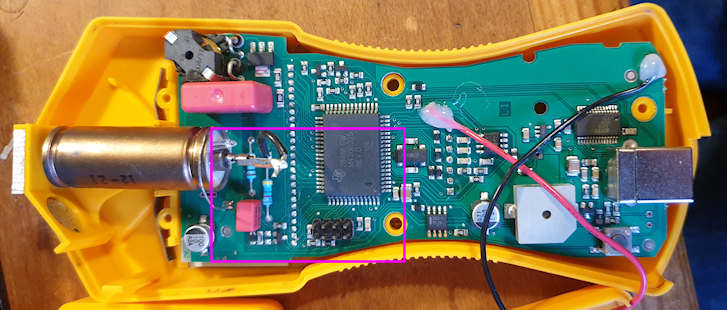
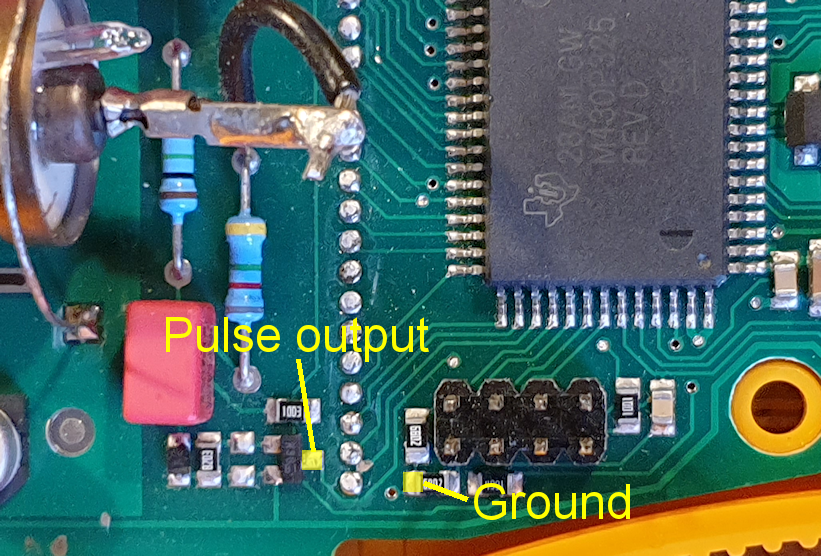
Open up the Gamma Scout and locate the small transistor at the top left of the board, right above the pin header. There we are going to solder on a wire to the middle pin on the transistor and also a ground connection. I chose one that is close and one end of a small resistor close to the transistor is connected to ground, but any ground on the board will do. Don't connect to the GM tube negative as this is not the same as the logic ground. See fig.1 and fig.2.
Fig.1 Locate the transistor at the top left of the board.
Fig.2 Locate the actual connections where we will be soldering the wires to.
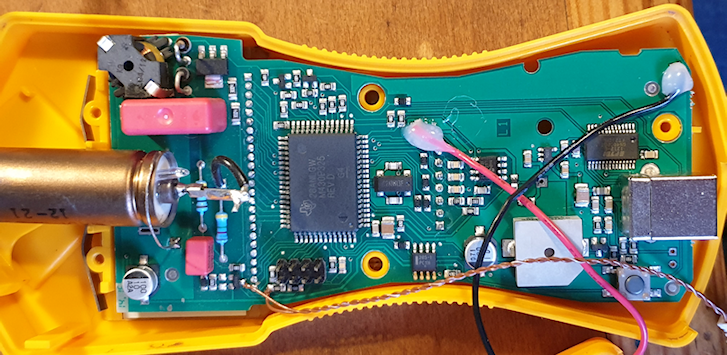
Being very careful solder two thin wires onto the connections (fig.3) and make a mental note of which wire is connected to the pulse and which is the ground. I have a small length of twin cable with a handy inline connector in my junk drawer so I'm going to use that so I can easily disconnect the MCU when I'm not using it.
Fig.3 Solder wires onto the two points on the circuit board we identified earlier. The wire I used has a crappy outer sheath as liked to melt easy. Be careful you don't short anything out.
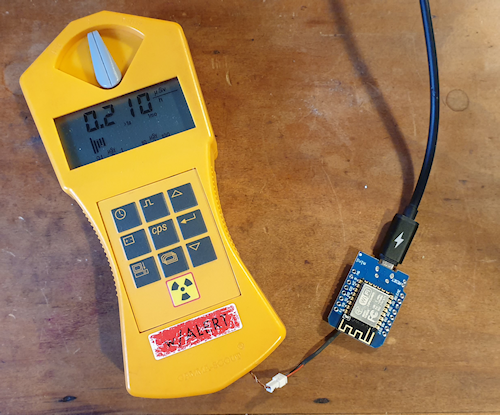
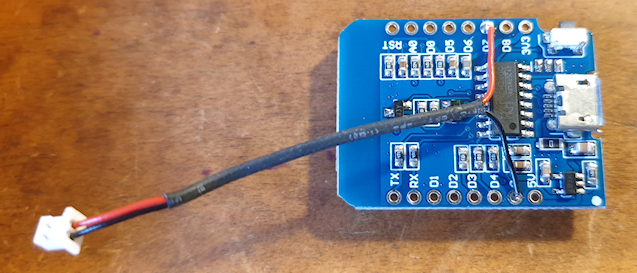
Once the wires are soldered in place add some hot glue over the connections to act as a relief for the solder joints then reassemble the Gamma Scout as we are finished with that part. Next it is time to connect the wires to the ESP8266 (Wemos D1 Mini clone). Connect the ground from the Gamma Scout to the ground on the ESP8266 and then connect the pulse wire to pin GPIO 13 (D7 on the Wemos) as shown in fig.4.
Fig.4 connect the wires (pulse and ground) from the Gamma Scout to the ESP8266
Then finally, connect the ESP8266 to your computer's USB and load up the arduino sketch attached below. The sketch is basically my bare bones Wemos D1 Mini sketch with a couple of small changes to enable the pulse to be read from the Gamma Scout properly. Opening the serial terminal you should see the ESP8266 is getting events and starting to count.
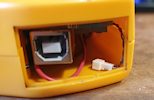
As I used an in-line connector on my Gamma Scout, when I am finished using it with the ESP8266 I can simply unplug it, place the wire and connector inside the Gamma Scout and pop the lid back on. And then it looks like nothing has been modified on the counter.
Happy hacking!
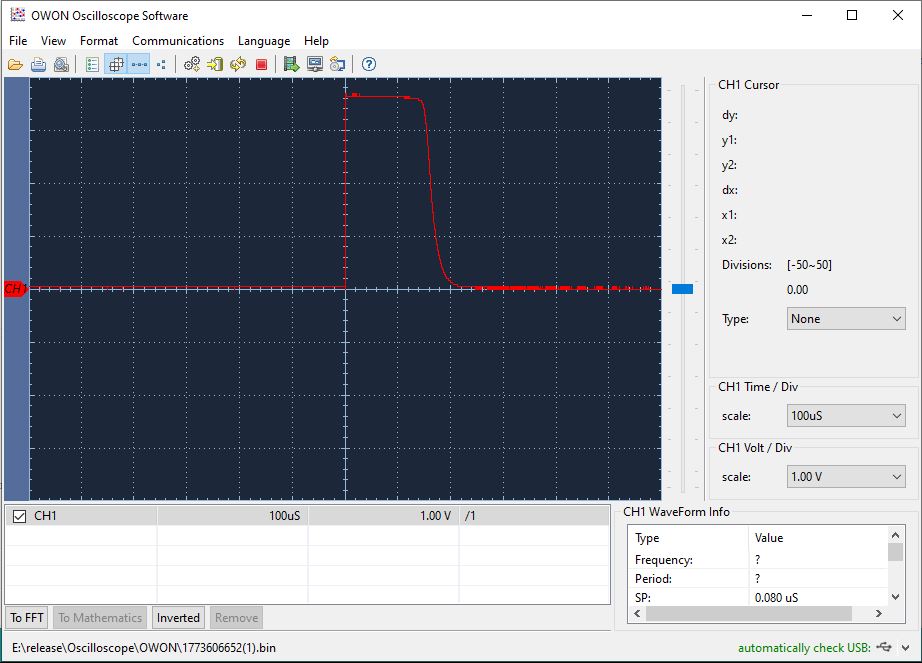
I forgot to mention; the Gamma Scout gives a really nice ~3.6v (same as the lithium battery?) rising pulse over about 150us. Here is waveform from when I was probing about:
Hacking the Gamma Scout Alert for radmon.org was created by Simomax
A member asked me if the Gamma Scout would/could work with radmon.org using the USB and software the counter came with. The answer to that is a simple, no, but it could be down with a quick hack. Simply add a couple of wires and connect them straight to an ESP8266 or similar MCU. This guide only covers the 'Alert' model. There may be differences with other Gamma Scout models. Here is how:
Open up the Gamma Scout and locate the small transistor at the top left of the board, right above the pin header. There we are going to solder on a wire to the middle pin on the transistor and also a ground connection. I chose one that is close and one end of a small resistor close to the transistor is connected to ground, but any ground on the board will do. Don't connect to the GM tube negative as this is not the same as the logic ground. See fig.1 and fig.2.
Fig.1 Locate the transistor at the top left of the board.
Fig.2 Locate the actual connections where we will be soldering the wires to.
Being very careful solder two thin wires onto the connections (fig.3) and make a mental note of which wire is connected to the pulse and which is the ground. I have a small length of twin cable with a handy inline connector in my junk drawer so I'm going to use that so I can easily disconnect the MCU when I'm not using it.
Fig.3 Solder wires onto the two points on the circuit board we identified earlier. The wire I used has a crappy outer sheath as liked to melt easy. Be careful you don't short anything out.
Once the wires are soldered in place add some hot glue over the connections to act as a relief for the solder joints then reassemble the Gamma Scout as we are finished with that part. Next it is time to connect the wires to the ESP8266 (Wemos D1 Mini clone). Connect the ground from the Gamma Scout to the ground on the ESP8266 and then connect the pulse wire to pin GPIO 13 (D7 on the Wemos) as shown in fig.4.
Fig.4 connect the wires (pulse and ground) from the Gamma Scout to the ESP8266
Then finally, connect the ESP8266 to your computer's USB and load up the arduino sketch attached below. The sketch is basically my bare bones Wemos D1 Mini sketch with a couple of small changes to enable the pulse to be read from the Gamma Scout properly. Opening the serial terminal you should see the ESP8266 is getting events and starting to count.
As I used an in-line connector on my Gamma Scout, when I am finished using it with the ESP8266 I can simply unplug it, place the wire and connector inside the Gamma Scout and pop the lid back on. And then it looks like nothing has been modified on the counter.
Happy hacking!
I forgot to mention; the Gamma Scout gives a really nice ~3.6v (same as the lithium battery?) rising pulse over about 150us. Here is waveform from when I was probing about:
Attachments:
Last edit: 3 years 3 weeks ago by Simomax.
Please Log in or Create an account to join the conversation.
Moderators: Gamma-Man
- Forum
- Geiger counter discussions
- Commericial geiger counters
- Hacking the Gamma Scout Alert for radmon.org
Time to create page: 0.207 seconds

